Project: Ethernet Enabled Twitter Client
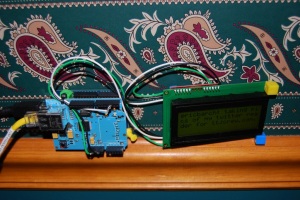
Posted: June 25, 2009 Filed under: Projects 3 CommentsFor my latest project I wanted to build a microcontroller powered device I could hang on my wall (or pin to at the time of writing this). I decided to build a Twitter reader, but not just any old “LCD connected to a PC” setup. No, I wanted this thing to be computer independent.
If you want to build one of these you’re going to need a few things…
1. Arduino Board
2. Arduino Ethernet Shield
3. Serial Enabled 20×4 LCD Screen
4. 5-9V Regulated Power Source
The Arduino USB Board is a great microcontroller to get you started and will allow you to build anything from notification systems to robots. The Ethernet Shield is a simple module that drops on top of the Arduino Board and allows the microcontroller to connect to an Ethernet connection and transfer data. The LCD screen I chose was serial enabled (simplifies our job immensely) so you just need to connect 3 wires to the display. You’re also obviously going to need a power source to power the whole thing (unless you want to tether the Arduino to your PC, but that defeats the purpose of a PC independent Twitter reader…now doesn’t it?) I was able to use a 5v regulated power adapter I had lying around but if you don’t have one of those I’d suggest getting the 9v adapter w/ barrel connector from SparkFun. Anyway, onto the build…
I started by wiring up 3 wires (+/-/signal) to my LCD screen as seen below.
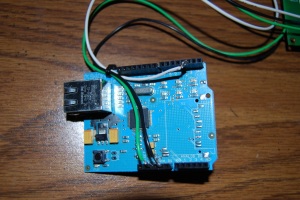
Next I had to find a way to connect these wires into the Arduino without just jamming the stripped wire directly into the Arduino. I found some small pins (you can use old resistors or any component for that matter which has solid pins coming from it) and soldered them to the ends of the wires that I connected to the LCD display. I then plugged these pins into the Ethernet Shield and zip tied the wiring in place. I connected the signal wire to pin 2 and the power wires to 5v and GND.
Now I just took the Ethernet Shield and stacked it on top of the Arduino Board.
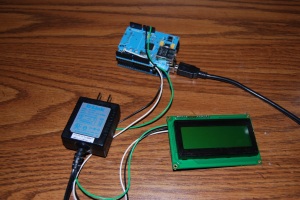
The next step was to power everything from a wall outlet. I found a regulated 5v power supply sitting on my desk that I wasn’t using. You have the option of powering the Arduino off the USB connector or through the barrel connector. The Arduino has a built in voltage regulator so that if you connect a power source to the barrel connector, it will be fed through this 5v regulator. If the power you’re feeding into the barrel connector is any lower than about 7v, the regulator won’t be able to properly supply the 5v. Because I already had an adapter that was outputting almost exactly 5v (and always make sure to check with a multimeter!) I soldered a USB connector onto the end of the supply. This way I could feed the Arduino Board my 5v without feeding it through the voltage regulator.
Ok, so now we’re done with the hardware. Now we actually need the code to make the Twitter Reader work. If you don’t already have the arduino software, you can download it from arduino.cc.
Here is my Arduino sketch I wrote for the twitter display: eTwitterLCD3.pde
Now, there are a few things you’re going to need to change to get this to run. At the top of the file you’ll see:
byte ip[] = { 192, 168, 1, 44 };
byte gateway[] = { 192, 168, 1, 254 }; //your router’s IP address
byte subnet[] = { 255, 255, 255, 0 }; //subnet mask of the network
You will need to change this to work on your network. The IP address doesn’t matter so long as it’s a valid IP and not in conflict with another device on your network.
A little further into the code you’ll find this:
client.println(“GET /statuses/friends_timeline/YOURTWITTERNAME.xml HTTP/1.0”);
client.println(“Authorization: Basic AUTH_KEY_GOES_HERE”);
This is the HTTP header that we are sending to twitter.com. Obviously for the first line you will enter your username before the “.xml”. For the second line we need to setup authentication with our twitter username and password. Basic HTTP authentication is simply the string “username:password” base64 encoded. So if your username was “foo” and your password was “bar”, you just need to base64 encode the string “foo:bar”, which would result in the authentication key of “Zm9vOmJhcg==”. For base64 encoding I simply just searched on google for a site that allowed you to enter a string and have it encoded to base64. It’s pretty easy to write a PHP script to do this as well, but I only needed to do it once so I just ended up using this site. Once you’ve got your authentication key entered into the sketch, upload it to your Arduino, connect an Ethernet cable, and you should be set to go. The Arduino will immediately begin pulling down your “friends” timeline and parsing out the most recent tweet. The software will automatically scroll between 2 pages if the tweet becomes that long.
There’s a few other options I’ve setup in the code that you can play around with. I’ve also tried to document the source code so you can better understand it, but if you really want to start learning how it works, just start hacking apart the code and playing around with the different functions. If you’re getting connection issues, keep in mind that Twitter will block requests for a few minutes if you request data too often. I’ve found a good minimum server contact interval to be around 2 minutes. Feel free to add to the code or change as you see fit. And don’t forget to post back here if you made something really cool using my code or the same basic idea. I’d love to see it or post updates with what you’ve come up with!


Ok, So I am going to build this. It looks like a fun little project and I was just wondering if you think it is possible to put a speaker on it to cherp when there is a new tweet. I see the code working, but I am not learned on the hardware side of this stuff yet. I know I will have to make a board to hold the speaker, but is it even possible to hook with the Arduino board. Let me know what you think! Thanks!
Yeah, that actually shouldn’t be too difficult. There are plenty of low power buzzers that you can connect. Just feed the GND connection to the ground of the Arduino and connect the + to a digital I/O pin on the arduino. Change the pin from low to high and that will sound the buzzer.
You’ve inspired me, Eric. Just purchasing an Arduino board + ethernet shield now so that I can make an independant control unit for my telerobotics site. Would also come in very handy for wireless robotics (with the help of a 5v wireless access point, network switch, and IP camera).